Reversing ELF
In this post, we will look into the room “Reversing ELF” from TryHackMe, which can be found on https://tryhackme.com
Part 1: Installing the IDA dissembler
If you have a problem installing the IDA dissembler on the Linux machine, please refer to the following steps.
Step 1: Download the IDA dissembler
First off, download the dissembler from this website: https://www.hex-rays.com/products/ida/support/download_freeware.shtml

IDA dissembler is freeware for non-commercial usage.
Step 2: Changing the executing permission
Locate to your downloaded IDA dissembler and change the permission with the following command.
chmod +x idafreexx_linux.run
The software version changes from time to time hence I put xx. For example, xx=70 represents version 7.0.
Step 3: Execute the installer
Execute the installer with the following command line.
./idafreexx_linux.run
Choose your desired destination to install the dissembler.
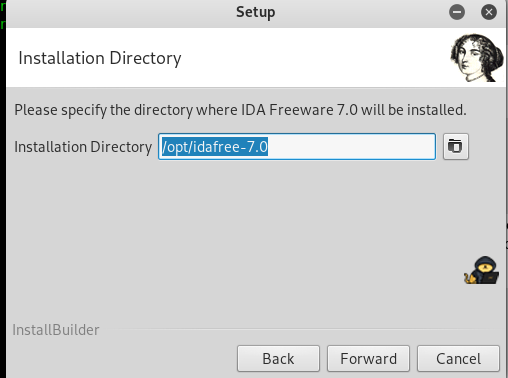
The default location is /opt. Once installed, input the following command to launch the IDA dissembler.
/opt/idafree-x.x/ida64
Step 4: Creating permanent alias (optional)
This is an optional step. In this step, I’m going to create an alias or command shortcut for the IDA dissembler.
First and foremost, visit the .bashrc from your home directory by using nano or vim
nano ~/.bashrc
After that, add the following line at the end of the file.
#custom aliases
alias ida="/opt/idafree-x.x/ida64"
Change the IDA dissembler version x.x before saving the file. Restart the machine or source the file for the instant load.
source ~/.bashrc
Next time, I just use my command “ida” to fire up my IDA dissembler.
Part 2: Into the challenge
There are a total of 8 tasks available in the room.
Task 1: Crackme1
This is the easiest task in the entire challenge. Execute the file with the following command to get the flag.
./crackme1
If you face any problem with executing the file, such as permission denied, you need to change the permission. Punch in the following command and you are good to go.
chmod +x crackme1
Task 2: crackme2
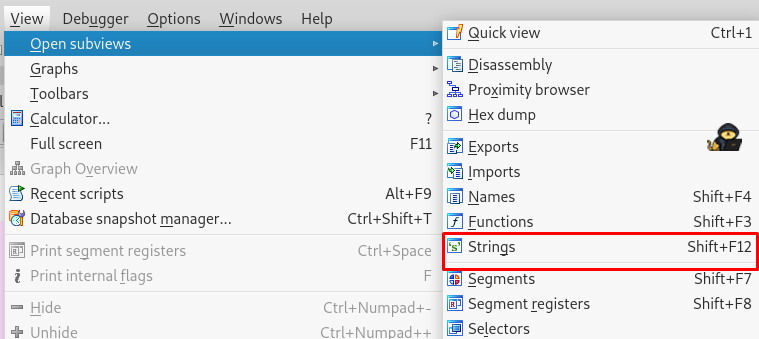
Time to launch your dissembler. For IDA dissembler, go to View > Open subviews > Strings. You should find something interesting.
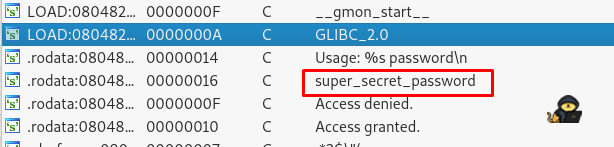
That is the password for the second flag. Run the following command and capture the flag.
./crackme2 super_secret_password
Task 3: crackme3
Similar to previous task, we need to find the string.
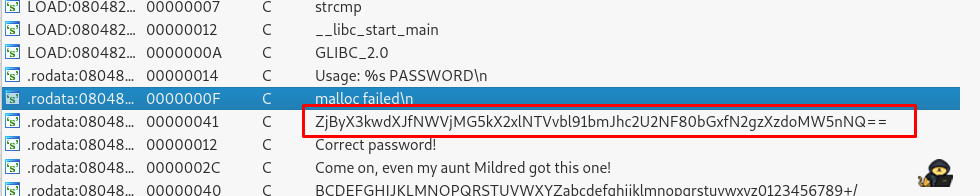
Look like we have a base64 encoded string. Use the following command to decode it.
echo ZjByX3kwdXJfNWVjMG5kX2xlNTVvbl91bmJhc2U2NF80bGxfN2gzXzdoMW5nNQ== | base64 --decode
Task 4: crackme4
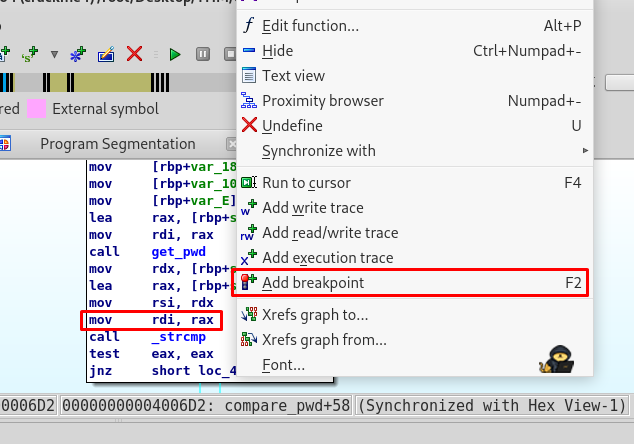
Time to get a little bit more serious now. This time, we are going to use the breakpoint. What is the breakpoint in a dissembler program? The breakpoint is a point where the program pauses or halt (not stop) in the process of running a program. That is the point where we going to debug the program.
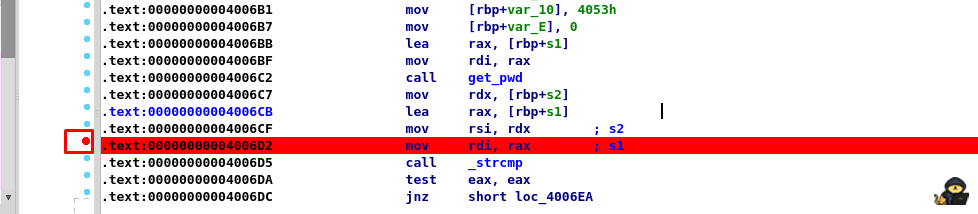
In this case, we are going to look into the memory and register value before comparing the strings. It might contain the result we want. There are two ways to put a breakpoint in the IDA dissembler. For the graph view, select the line we wish to put a breakpoint (the location before the strcmp) and simply do the right-click and navigate the breakpoint or you can press the F2 hotkey. Adding a breakpoint will getting a text with red highlight.
For text view, simply click the bullet on the left.
There is one more thing to do before running the program. We need an argument like task 2. Afraid not, navigate to Debugger > Process options to add the argument.
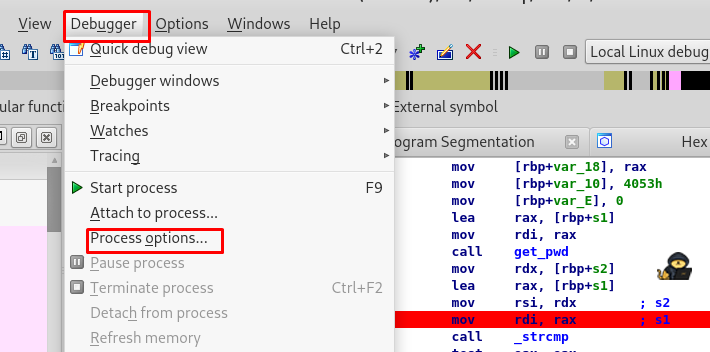
Add any argument you like, it just a dummy after all.
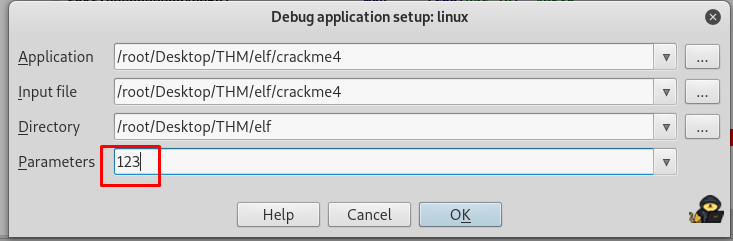
Everything is set now, time to run our program by clicking the small green play button.

After the run, the program somehow paused on the breakpoint. If you hover the mouse pointer to the register rdi at program memory 00000000004006D2 or mov rdi, rax, you will notice something interesting. Double click the rdi and get the password.
Task 5: crackme5
Let’s launch the crackme5 program and see what is inside it.

This time, the program scan for input from the user instead of an argument like the previous task. I’m going to relaunch the IDA dissembler with the following command.
cat | ida
P/S: If you skipped Part 1 step 4, ida is my own custom alias.
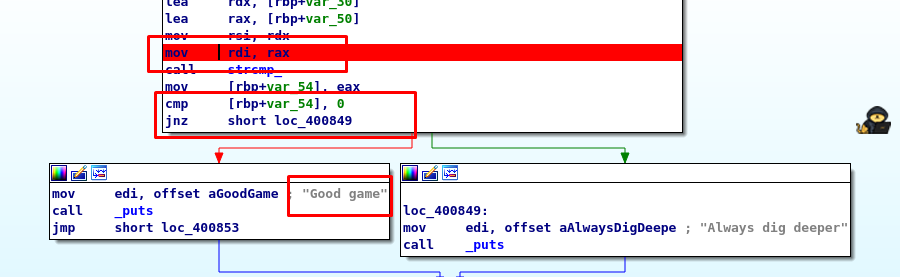
The task required us to find the input that gives out the “good game”. Refer to the dissembler in the graphical view, the strcmp function must return 0 (our input = given input) in order to jump into the “good game” block. Now, set a breakpoint before the strcmp function.
After that, run the program and navigate to the terminal we launch the IDA dissembler.

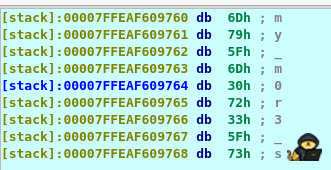
Put any dummy value you like, press enter and go back to the dissembler. If you investigate the register rsi at the program memory 0000000000400829, you will notice a list of character while register rdi stored our dummy data.
The entire string is the result we are looking for. Putting the string in the input in result of “good game”
Task 6: crackme6
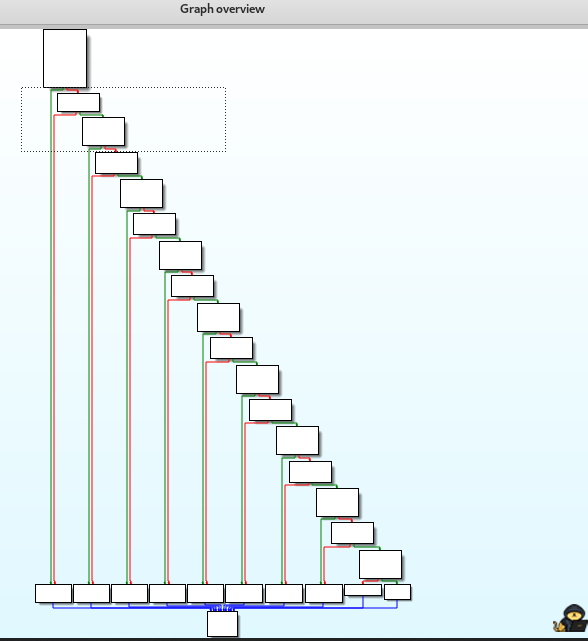
For me, this task is much easier compared to tasks 4 and 5. The password is located at my_secure_test function. If you enlarge the graph overview, it looks like a ladder.
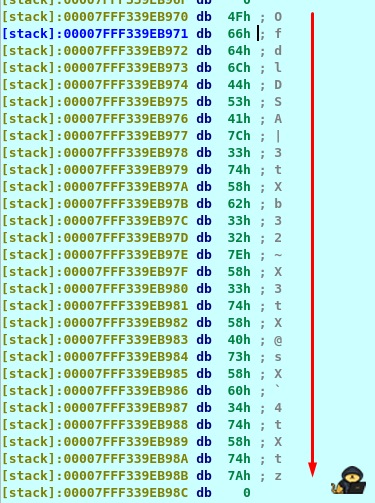
Based on my logical point of view, the program compares each input letter form the beginning to the end.
If you do a short track and trace for the ladder, you will end up the following hex.
31 33 33 37 5F 70 77 64
Convert the hex to ASCII, you will get the text.
Task 7: crackme7
Let see what is inside the program.
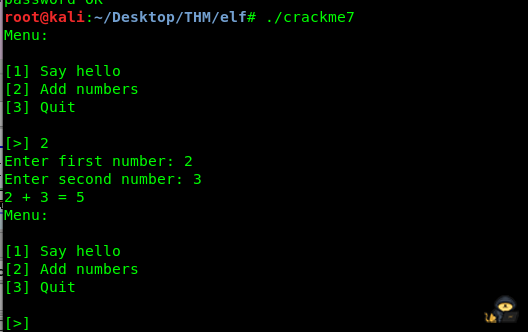
Huh, just a simple hello and addition calculator, nothing special. If you do an investigation by using the dissembler, you will come across a secret message and a give flag function.
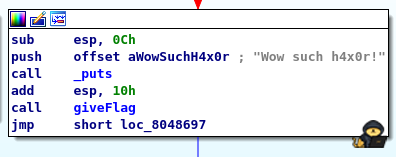
How are we going the get the flag? If you trace back to the previous block, you come across the following.

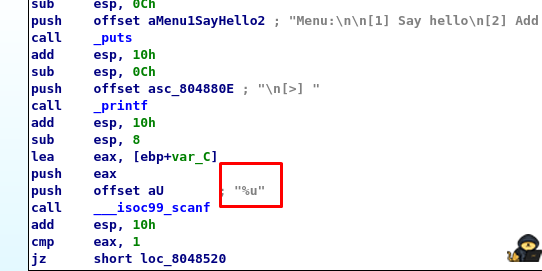
We need to compare a hex value 7A69. In ASCII, the value translated as ‘zi’.

Look like the program only accept integer. The %u formatting or unsigned integer scanf explains the cause.
The decimal of 0x7A69 is 31337, let’s give it a try again.
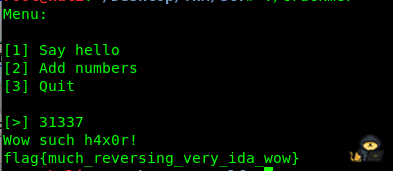
Bingo!
Task 8: crackme8
Time to capture the last flag! This task is a bit tricky as the result involved with signed integer or two’s complement binary. Tracking the giveflag function is quite easy.
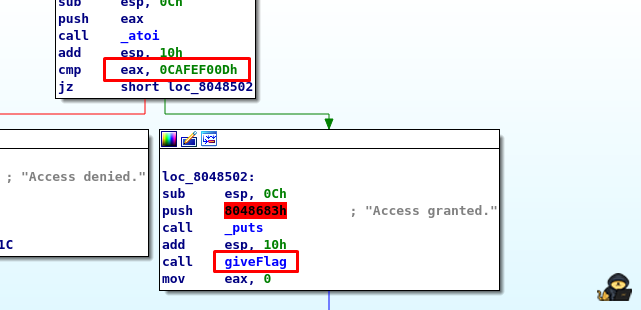
The input password will be converted to an integer by the atoi function. If you refer to the atoi manual, the value returned is an integer instead of an unsigned integer. On the other hand, the hex value we need to compare with is CAFEF00D, forget the ‘0’ as a register can only hold a maximum 64-bit (for 64-bit architecture). If you notice the first binary of the hex is ‘1’ which means the password is a negative value. The decimal of CAFEF00D is -889262067. Let’s give it a try.

Our last flag.